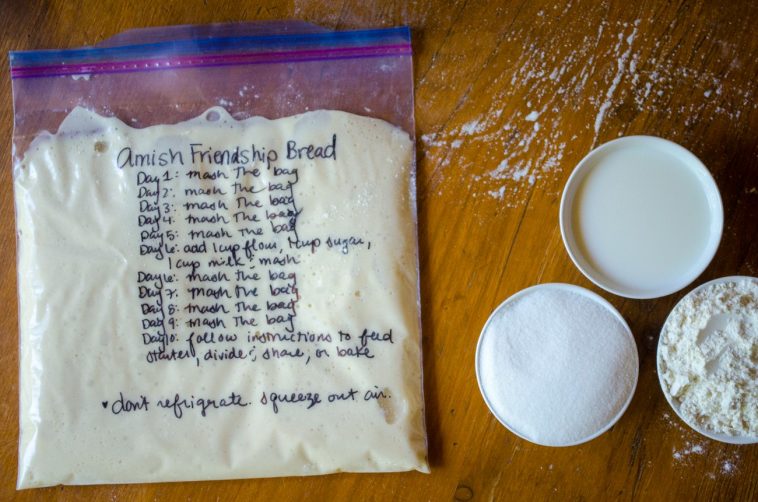
An Amish Friendship Bread starter is a little bit like a chain letter in bread form. Except that no one likes chain letters, and everyone loves Amish Friendship Bread. You mix up a little yeast, flour, sugar, and milk in your kitchen, and after a few days you have enough of a sweet sourdough starter to share with friends. It’s as much about the process as it is about the recipe. The starter is passed from friend to friend with the recipe and maybe a fresh loaf of bread, so that the little bit of love that started out in your kitchen eventually extends out to a friend-of-a-friend and a friend-of-a-friend-of-a-friend and right on down the line. It’s a heartfelt and special gift that shows what good food and home-cooking is all about – sharing the love of our home and our hearts with others.
The process takes ten days, but it’s as simple as can be. On day one, you mix up some flour, milk, sugar, and yeast and let it sit at room temperature until bubbly. You can store the starter in a ziplock bag with the instructions written right on it, or you can mix it up in a bowl and leave it loosely covered. You just want to make sure to use non-metal bowls and utensils as sourdough is acidic and can dissolve some metals. On days 2-5, you simply mash the bag around a bit and let it sit out on the counter. As the mixture ferments, the bag can fill up with air, so just release it from time to time so you don’t come into the kitchen to find a starter explosion.
On day 6, you feed the starter with a little more flour, milk, and sugar, before mashing the bag. Days 7-9 is just more bag mashing. On day 10, you pour the starter into a bowl and mix in more flour, sugar, and milk before dividing it into one cup portions in separate gallon ziplock bags. You’ll end up with anywhere between 4-7 cups of starter depending on how active your starter was. You can keep one bag for yourself, and give the other bags away to friends.
If you end up with too much starter to give away (or if you just want to keep it all to yourself – we don’t blame you), you can freeze it in one cup increments. When it’s time to bake, you just pull it out of the freezer to thaw and treat the starter as if it were day 1. You can bake with it right away, or you can follow the ten day process all over again.
If you want to keep your starter going, you just need to keep it at room temperature and feed it every five days or so with more flour, sugar, and milk. It’ll keep going, and going, and going, and taking on a richer flavor as it does. Simple as that.
Amish Friendship Bread starter is a sweet sourdough starter that is the gateway to countless buns, rolls, quick breads, risen breads, muffins – you name it. It has a unique flavor all its own, and we love the process and sentiment behind it as much as the delicious baked goods it can create.
To Make this Recipe You’Il Need the following ingredients:
Ingredients
- 1/4 cup warm water
- 1 package (2 1/4 teaspoons) active dry yeast
- 1 cup all-purpose flour
- 1 cup granulated sugar
- 1 cup milk
Instructions
Day 1:
-
In a small bowl, combine the warm water and yeast and set aside until bubbly, 5-10 minutes. In a large non-metal bowl mix together flour and sugar, before stirring in the milk and yeast mixture.
-
Cover loosely and allow to stand at room temperature until bubbly. Pour into a one gallon ziplock bag and seal. Allow to sit at room temperature.
Day 2:
-
Mash the bag.
Day 3:
-
Mash the bag.
Day 4:
-
Mash the bag.
Day 5:
-
Mash the bag.
Day 6:
-
Add 1 cup flour, 1 cup sugar, and 1 cup milk. Mash the bag until well mixed.
Day 7:
-
Mash the bag.
Day 8:
-
Mash the bag.
Day 9:
-
Mash the bag.
Day 10:
-
Pour starter into a non-metal bowl and add 1 cup flour, 1 cup sugar, and 1 cup milk. Mix well with a non-metal spoon. Divide out 1 cup portions of the starter into separate 1 gallon ziplock bags. Keep one bag for yourself, and give the rest away to friends along with this recipe!


